3D Basketball Hole in a Wall Tumbler: A Guide to Flawless Sublimation
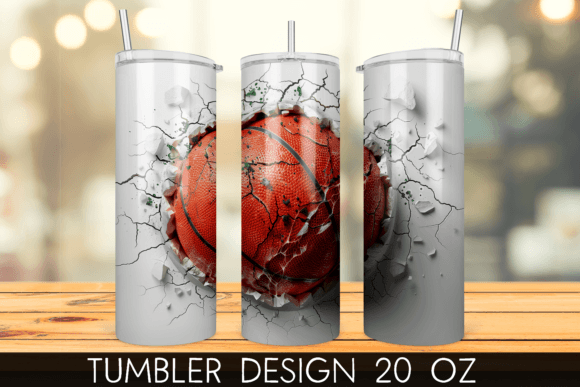
The intersection of sports fandom and personalized drinkware has created a booming niche for creators, and few designs capture the dynamic energy of the game quite like a 3D Basketball Hole in a Wall Tumbler. This specific aesthetic creates an optical illusion where the basketball appears to be smashing through the surface of the cup, offering depth and visual impact that flat graphics simply cannot match. For sublimation printers, hobbyists, and small business owners, mastering this design is not just about downloading a file; it is about understanding the technical nuances that transform a digital image into a professional-grade physical product.
However, enthusiasm often outpaces preparation. Many creators rush into printing these complex wraps without fully grasping the requirements of high-resolution sublimation. The result is often a blurry image, misaligned seams, or colors that look muddy rather than vibrant. To help you avoid these common pitfalls, we need to look closely at what makes this specific Basketball tumbler wrap 20 oz sublimation design unique and how to handle it correctly from download to press.
Understanding the Digital Asset Requirements
Before you even turn on your heat press, you must verify the integrity of your digital file. A frequent mistake among beginners is assuming that any PNG file labeled "basketball" will work for a full wrap. It will not. The 3D Basketball Hole in a Wall effect relies heavily on precise shading and perspective. If the resolution is low, the illusion of depth collapses, leaving you with a pixelated mess that looks unprofessional.
When you acquire this listing, you are receiving a High-Resolution PNG with 300 DPI. This density is non-negotiable for sublimation. Printing at anything lower than 300 dots per inch will result in visible jagged edges, particularly around the curved lines of the basketball and the shattered wall effect. Always check your printer settings to ensure you are not inadvertently downscaling the image during the print process. Furthermore, remember that this is a full wrap 20oz skinny tumbler sublimation design PNG. It is designed specifically for the curvature of a standard 20-ounce skinny tumbler, which differs significantly from straight-walled mugs or wider tumblers.
The Critical Step of Resizing and Alignment
One of the most overlooked details in sublimation is the manual adjustment of dimensions. Even though the file is provided at high quality, it is rarely pre-sized to fit every brand of tumbler perfectly due to slight manufacturing variations. The instructions clearly state: You will need to resize the design to 9.3″ x 8.2″.
Ignoring this step is a recipe for disaster. If you print the design at its default size without checking the aspect ratio against your specific tumbler’s circumference and height, you will face two major issues. First, the seam may not align, causing the basketball graphic to split awkwardly at the back of the cup. Second, the top or bottom of the design might get cut off or leave unsightly white gaps.
To avoid this, always measure your blank tumbler before printing. Use a flexible measuring tape to confirm the circumference. While 9.3 inches is the standard width for many 20oz skinny tumblers, some brands vary by a fraction of an inch. Adjust your design software accordingly, ensuring you maintain the aspect ratio so the basketball does not look stretched or squashed. A distorted sphere breaks the 3D illusion immediately.
Material Selection and Print Quality
The substrate matters as much as the ink. This design features dark tones, bright oranges, and subtle shadows to create the 3D wall effect. These details require a high-quality sublimation paper and ink set. Using cheap, coated paper can lead to ink pooling or bleeding, which blurs the sharp edges of the "broken wall."
Additionally, ensure your tumbler blanks are polyester-coated. Sublimation ink bonds only with polymer coatings. If you attempt to use this design on a ceramic mug without a proper coating or a stainless steel tumbler that isn't sublimation-ready, the image will wipe right off. Always source your blanks from reputable suppliers who guarantee a high-quality polymer coating suitable for full-wrap applications.
Heat Press Technique for Full Wraps
Applying a full wrap requires more finesse than a simple front-facing logo. The 3D Basketball Hole in a Wall Tumbler design covers the entire surface, meaning there is no "safe zone" where minor wrinkles or bubbles can hide. Common errors here include uneven pressure and incorrect temperature settings.
- Temperature Consistency: Ensure your heat press or oven is calibrated. Hot spots can cause banding, while cool spots result in faint transfers.
- Tension Management: When wrapping the shrink film or heat-resistant tape around the tumbler, apply even tension. Too tight, and the design stretches; too loose, and it shifts during the press.
- Seam Placement: Place the seam of the paper at the back of the tumbler, directly opposite where the main focal point of the basketball should be. This ensures the primary visual element remains uninterrupted.
It is also vital to note that no physical product will be shipped to you. This is a digital download. Some buyers mistakenly expect a finished tumbler and leave negative reviews when they receive a file link. As a creator, if you are selling the finished product, make sure your own listings clearly distinguish between the digital design and the physical item to manage customer expectations effectively.
Maximizing Market Appeal
Why choose this specific design? The market is saturated with generic sports logos. The 3D Hole in a Wall concept stands out because it offers a modern, edgy aesthetic that appeals to a broader demographic, including adults aged 20–50 who want stylish drinkware rather than just team merchandise. It works exceptionally well for gifts, school fundraisers, or personal branding for coaches and players.
To maximize the appeal, consider pairing this design with complementary accessories. A clear lid and a straw that matches the orange or black tones of the basketball can elevate the final presentation. When photographing your finished product for social media or online stores, use lighting that highlights the gloss of the tumbler, enhancing the 3D effect of the graphic.
Final Checks Before Production
Before you commit to a large batch, always run a test print. Print one single tumbler wrap using the 9.3″ x 8.2″ dimensions. Check the color accuracy, the sharpness of the 3D effect, and the seam alignment. This small investment of time and material saves you from wasting dozens of blanks and hours of labor on a flawed setup.
In conclusion, the 3D Basketball Hole in a Wall Tumbler is a powerful tool for creators looking to expand their product line with high-impact designs. By respecting the technical requirements—specifically the 300 DPI resolution, the precise resizing needs, and the careful application process—you can produce stunning, professional-quality tumblers that stand out in a crowded marketplace. Avoid the common traps of assumption and haste, and let the quality of your craftsmanship speak for itself.